

To steam milk for latte, start with cold milk in a cold pitcher, add air for only two to four seconds, then lower the wand tip and spin the milk until it reaches about 60°C (140°F). The result should be glossy, pourable, and slightly sweet, with foam so fine you can barely see it.
That is the whole method. The details that make it work are wand position, timing, and when you stop, and this guide covers each of them. It assumes you have an espresso machine with a steam wand. If you do not, our guide to frothing milk without a frother covers other options.
What You Need
- An espresso machine with a steam wand
- A stainless steel milk pitcher, 350 ml (12 oz) for one latte or 600 ml (20 oz) for two
- Cold milk, straight from the refrigerator at about 4°C (39°F)
- A damp cloth reserved for the wand
- A thermometer, optional but helpful while you build the habit
- A cup of 240–300 ml (8–10 oz) and a double shot of espresso, about 36 g (1.3 oz) of liquid
Steel matters because it lets you feel the temperature through your hand. A pitcher with a pointed spout also makes pouring much easier. If your espresso itself needs work, start with our guide to making a good espresso, because even perfect milk cannot rescue a sour or bitter shot.
What Good Steamed Milk Looks Like

Good steamed milk is called microfoam. Instead of a stiff cap of bubbles on top of hot liquid, the air is broken into tiny bubbles and blended through the whole pitcher. It looks like wet paint and moves like thick cream.
A latte uses very little foam. A layer of about 5–10 mm (¼–⅜ in) on top of the drink is typical, and the rest is smooth, heated milk. Compare that with a cappuccino, where the foam layer is much deeper and airier. If you want the full picture of the drink itself, see our page on the cafe latte.
Milk foams because its proteins wrap around air bubbles and hold them in place, while the fat gives the foam a soft, creamy feel. Heat helps up to a point. Past roughly 70°C (160°F), the milk tastes flat and cooked, and the foam starts to break down.
How to Steam Milk for Latte, Step by Step
Turn the machine on early so the boiler is fully up to steam pressure before you start. Pull your espresso shots first or while the milk is steaming, but keep the milk the priority. Milk waits badly, and espresso waits worse.
- Measure the milk. Pour 180–200 ml (6–7 oz) of cold milk into the pitcher. The surface should sit just below the base of the spout. Too little milk and the wand tip cannot stay submerged. Too much and it overflows as it expands.
- Purge the wand. Point it at the drip tray and open the valve for one or two seconds. This clears condensed water so it does not dilute your milk.
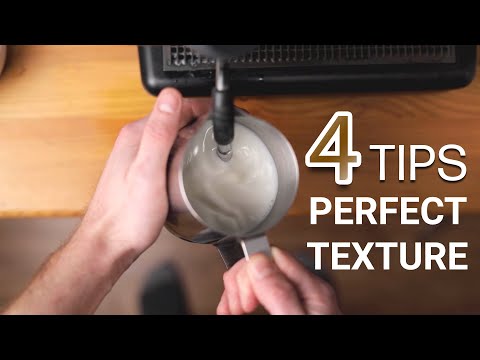
- Position the tip. Lower the pitcher until the tip sits just under the surface, about 1 cm (½ in) deep, slightly off center. Angle the pitcher a little so the wand points toward the side wall rather than straight down.
- Open the steam fully. Turn the valve all the way. Partial pressure steams slowly and tends to produce bigger bubbles.
- Stretch the milk. Hold the tip near the surface until you hear a soft, steady hiss, like tearing paper. For a latte, keep this up for two to four seconds. The pitcher should feel slightly fuller, and the milk volume should grow by about 20–30%.
- Submerge and spin. Lower the pitcher a little so the tip goes deeper and the hiss disappears. The milk should start to rotate in a whirlpool. This folds the foam into the liquid and breaks up larger bubbles.
- Heat to temperature. Keep spinning until the milk reaches 55–60°C (130–140°F). Without a thermometer, stop when the pitcher is too hot to hold against your palm for more than a second or two. Turn the steam off before you remove the wand, or the milk will spray.
- Clean the wand right away. Wipe it with the damp cloth, then purge again for a second. Dried milk blocks the holes quickly and is hard to remove.
- Tap and swirl. Tap the pitcher on the counter once or twice to pop any surface bubbles, then swirl it so the milk stays glossy. Pour straight away.
The temperature keeps climbing for a few seconds after the steam is off, so stopping at 60°C (140°F) usually lands you in a comfortable drinking range. If you are working with a thermometer, practice stopping a few degrees early and see where the milk ends up.
Timing and Temperature by Drink
The same technique makes all the milk drinks. What changes is how long you stretch the milk and how much foam you want. Use this as a starting point and adjust to your taste.
| Drink | Stretching time | Foam layer | Finishing temperature |
|---|---|---|---|
| Latte | 2–4 seconds | Thin, about 5–10 mm (¼–⅜ in) | 55–60°C (130–140°F) |
| Flat white | 1–3 seconds | Very thin, velvety | 55–60°C (130–140°F) |
| Cappuccino | 5–8 seconds | Deep, about 1–2 cm (½–¾ in) | 55–62°C (130–145°F) |
If you prefer the denser, silkier style, see our notes on the flat white. It needs even less air than a latte.
Fixing Common Milk Problems

Almost every failed pitcher comes from one of a handful of causes. Use the table to find yours.
| What you see | Likely cause | Fix |
|---|---|---|
| Large, soapy bubbles | Tip too close to the surface for too long, or no spin | Shorten the stretch, then submerge the tip deeper and get a clear whirlpool going |
| Thin, watery milk | No air added, or tip too deep from the start | Start with the tip right at the surface and listen for the hiss |
| Stiff, dry foam like meringue | Stretched too long | Cut stretching to two or three seconds for a latte |
| Burnt or flat taste | Heated above about 70°C (160°F) | Stop earlier and use a thermometer until you can judge by hand |
| Milk will not spin | Tip too central or pitcher too full | Move the tip off center and use a little less milk |
| Foam separates in the cup | Milk sat too long before pouring | Swirl and pour immediately after steaming |
If the pitcher is steaming but nothing is happening, check that the wand holes are clear. Dried milk can block one of them, which weakens the spin and makes the steam spray unevenly.
Choosing Milk for Steaming
Whole milk is the easiest to steam. It has enough protein and fat to produce stable microfoam and a sweet, round flavor. Reduced-fat milk also works and gives a lighter body, and skim milk makes plenty of foam but it feels drier and less creamy.
Plant-based milks behave differently from brand to brand. Versions labeled for baristas are usually formulated to hold foam better and resist splitting under heat. Many plant milks do best with a slightly shorter stretch and a lower finishing temperature. Test a small amount before committing a full pitcher, because oat, soy, almond, and others each respond a bit differently.
Fresh milk matters more than people expect. Milk close to its date foams less cooperatively and tastes duller when heated. Always start from the coldest milk you have, and use a fresh pour each time rather than re-steaming leftovers.
Pouring and Practicing the Routine
Once the milk is ready, hold the cup at a slight angle and pour from a low height at first so the milk goes beneath the crema. Bring the pitcher closer and level the cup as it fills. This is also where latte art begins, and our guide on how to make latte art picks up from this point.
Practice with water and a drop of dish soap if you want to save milk. It will not match the real thing, but it lets you work on wand position and the whirlpool without waste. When you move back to milk, run one pitcher at a time and note what you changed. Within a handful of tries, the hiss, the spin, and the feel of the pitcher start to make sense, and the timing becomes second nature.
Frequently Asked Questions
How much milk do I need for one latte?
About 180–200 ml (6–7 oz) of cold milk in a 350 ml (12 oz) pitcher is enough for one latte with a double shot. Steaming adds volume, so leave room below the spout to avoid overflow.
Can I steam milk again if it cools down?
It is better not to. Reheating steamed milk usually produces dry, bubbly foam and a flatter taste, because the proteins have already been through heat once. Steam a fresh batch from cold milk instead.
Does the pitcher need to be cold?
A cold pitcher gives you a little more time before the milk gets hot, which helps while you learn. It is not essential, but rinse the pitcher under cold water if it is warm from a previous round.
What if my steam wand has no thermometer or a weak output?
Use a clip-on or probe thermometer, or feel the pitcher with your palm. With weaker steam, use a smaller amount of milk, such as 120–150 ml (4–5 oz), so the milk heats and spins before the foam breaks down.